Aller au contenu

cubitus_syno

Membres
  • Compteur de contenus

    41
  • Inscription

  • Dernière visite

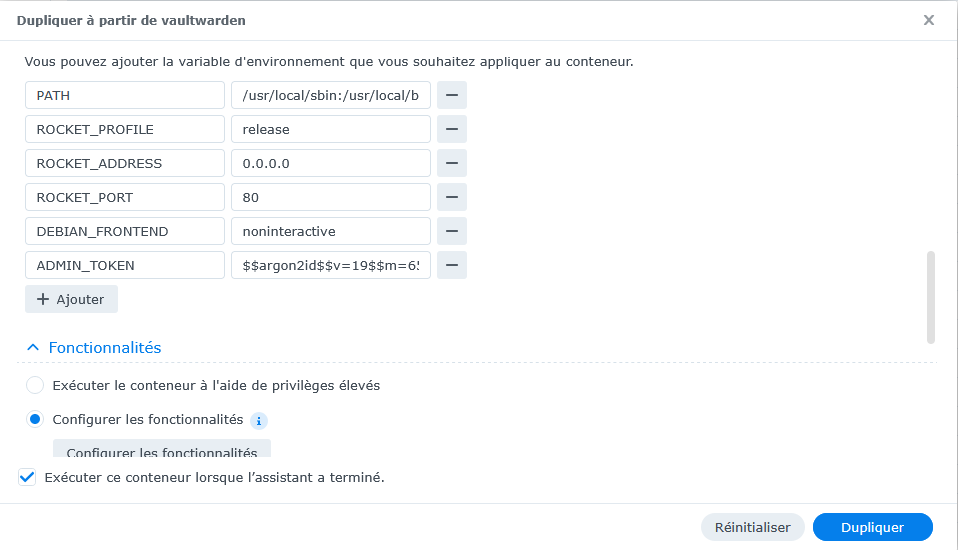
À propos de cubitus_syno

Mon Profil

  • Sex
    Masculin
  • Pays / Ville
    nancy
  • Mon NAS
    DS124

Visiteurs récents du profil

4314 visualisations du profil

cubitus_syno's Achievements

Explorer

Explorer (4/14)

  • Dedicated Rare
  • Reacting Well Rare
  • Collaborator Rare
  • First Post Rare
  • Conversation Starter Rare

Recent Badges

0

Réputation sur la communauté

  1. Une question Est-il possible d'ajouter un SSD par exemple de 256 giga sur un port USB qui pourrait servir de fichier d'échange ? Est ce que ça serait plus efficace que le fichier d'échange qui est créé sur le disque mécanique ?
  2. Ce que je critique de la part de synology pour ce NAS c'est de mettre des outils qui finalement ne seront pas vraiment utilisables sur ce modèle. Oui j'aurais dû sans doute me renseigner davantage... C'est toujours facile à dire après coup. Le 723 plus effectivement est bien mieux adapté, néanmoins c'est un coup de 500 à 600€ avec l'extension de RAM. Je vais me contenter de ma brouette et je vais reprendre mon raspberry PI pour teslamate qui m'a coûté 30€ 🙂
  3. Au moment critique, je n'avais plus accès à l'interface web tellement c'était surchargé... Mais au moment où ça ralentissait fortement le moniteur de ressources lui ne disait pas grand chose : utilisation CPU de 5% utilisation mémoire de 50% Le seul truc qui était a priori sollicité c'était le disque dur qui tournait autour 15 à 20Mo/s probablement le SWAP J'ai l'impression à vous entendre que c'est un peu un escroquerie ce NAS parce que sorti de une ou 2 fonctions assez basiques et du stockage, il sert à rien d'autre... C'est très décevant... J'ai l'impression que si j'ai pris un raspberry PI avec 4 gigas de mémoire transformé en NAS DIY maison, ça fonctionnerai mieux 😞
  4. Bonjour, J'ai un DS124 avec un giga de mémoire, un disque dur de 12 giga et un processeur à 4 cœurs. Jusqu'à présent c'était essentiellement du stockage de vidéos avec une diffusion en UPNP. comme ce nouveau NAS a un processeur un peu plus puissant (par rapport à mon précédent DS116) je m'étais mise en tête d'installer via docker des applications qui tournaient sur des raspberry PI j'avais installé teslamate et Zibee2MQTT. Pris individuellement, les paquets semblent fonctionner, mais ensemble et dès qu'il y a une sollicitation avec une interface web, le disque dur se met à gratter comme un fou le système ralentit jusqu'à bloquer au point de devoir le rebooter. C'est la 3e fois que ça arrive, du coup, j'ai désactivé le paquet teslamate. Je me pose la question : est ce qu'il y a quelque chose qui ne va pas dans un de ces paquets où clairement mon NAS n'est pas fait pour ça ? l'instruction top au moment de la surcharge : Marc@Nas2:~$ top top - 13:37:58 up 18:13, 1 user, load average: 36.54, 34.60, 22.28 [IO: 36.04, 34.18, 21.99 CPU: 0.50, 0.41, 0.28] Tasks: 395 total, 2 running, 393 sleeping, 0 stopped, 0 zombie %Cpu(s): 1.4 us, 6.0 sy, 0.0 ni, 0.1 id, 92.4 wa, 0.0 hi, 0.1 si, 0.0 st GiB Mem : 0.946 total, 0.080 free, 0.438 used, 0.428 buff/cache GiB Swap: 2.000 total, 0.883 free, 1.117 used. 0.281 avail Mem PID USER PR NI VIRT RES %CPU %MEM TIME+ S COMMAND 21631 999 20 0 353.2m 7.5m 2.114 0.773 0:06.08 R postgres: teslamate teslamate 172.22.0.5(35230) SELECT 19097 472 20 0 1527.3m 32.8m 2.057 3.392 3:00.54 S grafana server --homepath=/usr/share/grafana --config=/etc/grafana/grafana.ini --packaging=docker cfg:default.log.mode=console cfg:default.paths.data=/var/lib/grafana cfg:default.pat+ 14106 root 20 0 1898.9m 15.8m 1.829 1.632 7:04.95 D /var/packages/ContainerManager/target/usr/bin/dockerd --config-file /var/packages/ContainerManager/etc/dockerd.json 21585 999 20 0 353.2m 30.3m 0.914 3.130 0:01.37 D postgres: teslamate teslamate 172.22.0.5(35218) SELECT 14159 root 20 0 1457.2m 14.8m 0.857 1.529 0:28.93 S containerd --config /var/run/docker/containerd/containerd.toml --log-level info 21915 Marc 20 0 33.5m 2.1m 0.857 0.215 0:02.20 R top 16176 AudioSt+ 15 -5 424.7m 2.2m 0.743 0.224 0:47.98 S /var/packages/AudioStation/target/sbin/synoaudiod 9626 root 20 0 75.3m 2.7m 0.686 0.276 4:16.75 S /usr/bin/snmpd -fLn -c /etc/snmp/snmpd.conf -p /var/run/snmpd.pid udp:127.0.0.1:161,tcp:127.0.0.1:161 21966 999 20 0 351.4m 20.1m 0.686 2.078 0:00.98 D postgres: parallel worker for PID 1173 22925 root 20 0 4452.4m 35.5m 0.686 3.670 13:50.85 D node index.js 12828 sc-home+ 20 0 1584.0m 20.9m 0.571 2.163 4:46.41 D /volume1/@appstore/homeassistant/env/bin/python3 /volume1/@appstore/homeassistant/env/bin/hass -v --config /volume1/@appdata/homeassistant/config --log-file /volume1/@appdata/homeass+ 22091 root 20 0 14.4m 2.0m 0.571 0.202 0:00.10 D /run/synovpnnet remove_disconnect_clients --prtl=openvpn 9320 root 10 -10 49.6m 3.3m 0.457 0.339 0:45.98 S synoscgi
  5. Oui excusez ! j'ai suivi ce tuto à partir de la minutes 14 il est en allemand mais c'est OK
  6. j'ai trouvé une vidéo qui explique pas trop mal sauf que c'est allemand 🙂 # Home Assistant integration (MQTT discovery) homeassistant: false # allow new devices to join permit_join: true # MQTT settings mqtt: # MQTT base topic for zigbee2mqtt MQTT messages base_topic: zigbee2mqtt # MQTT server URL server: 'mqtt://192.168.0.2' # MQTT server authentication, uncomment if required: # user: my_user # password: my_password # Serial settings serial: # Location of CC2531 USB sniffer port: tcp://192.168.0.50:6638 baudrate: 115200 advanced: transmit_power: 20 network_key: GENERATE pan_id: GENERATE ext_pan_id: GENERATE le contenaire ne plante pas mais je n'ai pas l'interface web en 192.0168.0.2:8085
  7. L'image koenkk/zigbee2mqtt, je l'ai installé via conteneur manager, mais je ne sais pas comment le paramétrer correctement Pour Zigbee2MQTT je l'ai essayé j'ai essayé de le suivre, j'ai essayé de rentrer via portainer dans stacks les paramètres qui étaient donnés mais ça coince systématiquement sur mon device qui n'est pas un dongle USB. devices: # Make sure this matched your adapter location - /dev/serial/by-id/usb-Texas_Instruments_TI_CC2531_USB_CDC___0X00124B0018ED3DDF-if00:/dev/ttyACM0 Sur l'interface web du coordonnateur j'ai une configuration que j'ajoute ce qui me donnerai : version: '3.8' services: zigbee2mqtt: container_name: zigbee2mqtt image: koenkk/zigbee2mqtt restart: unless-stopped volumes: - ./data:/app/data - /run/udev:/run/udev:ro ports: # Frontend port - 8080:8080 environment: - TZ=Europe/Paris devices: serial: port: tcp://192.168.0.50:6638 baudrate: 115200 adapter: zstack # Désactiver la led verte ? disable_led: false # Réglez la puissance de sortie sur 20 maximum advanced: transmit_power: 20 et quand je "Deploy the stack" Deployment error Failed to deploy a stack: validating /data/compose/10/docker-compose.yml: services.zigbee2mqtt.devices must be a list
  8. Bonjour, Je suis débutant dans docker, j'ai installé une ou 2 petites choses en suivant de bons tutos. J'ai également installé portainer. J'ai un dongle coordonnateur Zigbee SLZB-06 LAN installé en 192.168.0.50 En cherchant, je trouve beaucoup d'installations plus ou moins anciennes de coordonnateurs zigbee. Le problème c'est que c'est quasi systématiquement fait avec des dongles USB... J'ai trouvé quelques brides faisant référence à mon dongle LAN, mais je n'arrive pas à trouver quelque chose de complet et cohérent qui me permet d'installer Zigbee2MQTT. Est ce que quelqu'un pourrait m'aider à installer Zigbee2MQTT
  9. Est ce qu'avec la configuration par défaut, c'est censé fonctionner ou est ce qu'il faut modifier quelque chose ?
  10. puré c'est long 🙂 Marc@Nas2:~$ cat /var/packages/mosquitto/var/mosquitto.conf # Config file for mosquitto # # See mosquitto.conf(5) for more information. # # Default values are shown, uncomment to change. # # Use the # character to indicate a comment, but only if it is the # very first character on the line. # ================================================================= # General configuration # ================================================================= # Use per listener security settings. # # It is recommended this option be set before any other options. # # If this option is set to true, then all authentication and access control # options are controlled on a per listener basis. The following options are # affected: # # acl_file # allow_anonymous # allow_zero_length_clientid # auto_id_prefix # password_file # plugin # plugin_opt_* # psk_file # # Note that if set to true, then a durable client (i.e. with clean session set # to false) that has disconnected will use the ACL settings defined for the # listener that it was most recently connected to. # # The default behaviour is for this to be set to false, which maintains the # setting behaviour from previous versions of mosquitto. #per_listener_settings false # This option controls whether a client is allowed to connect with a zero # length client id or not. This option only affects clients using MQTT v3.1.1 # and later. If set to false, clients connecting with a zero length client id # are disconnected. If set to true, clients will be allocated a client id by # the broker. This means it is only useful for clients with clean session set # to true. #allow_zero_length_clientid true # If allow_zero_length_clientid is true, this option allows you to set a prefix # to automatically generated client ids to aid visibility in logs. # Defaults to 'auto-' #auto_id_prefix auto- # This option affects the scenario when a client subscribes to a topic that has # retained messages. It is possible that the client that published the retained # message to the topic had access at the time they published, but that access # has been subsequently removed. If check_retain_source is set to true, the # default, the source of a retained message will be checked for access rights # before it is republished. When set to false, no check will be made and the # retained message will always be published. This affects all listeners. #check_retain_source true # QoS 1 and 2 messages will be allowed inflight per client until this limit # is exceeded. Defaults to 0. (No maximum) # See also max_inflight_messages #max_inflight_bytes 0 # The maximum number of QoS 1 and 2 messages currently inflight per # client. # This includes messages that are partway through handshakes and # those that are being retried. Defaults to 20. Set to 0 for no # maximum. Setting to 1 will guarantee in-order delivery of QoS 1 # and 2 messages. #max_inflight_messages 20 # For MQTT v5 clients, it is possible to have the server send a "server # keepalive" value that will override the keepalive value set by the client. # This is intended to be used as a mechanism to say that the server will # disconnect the client earlier than it anticipated, and that the client should # use the new keepalive value. The max_keepalive option allows you to specify # that clients may only connect with keepalive less than or equal to this # value, otherwise they will be sent a server keepalive telling them to use # max_keepalive. This only applies to MQTT v5 clients. The default, and maximum # value allowable, is 65535. # # Set to 0 to allow clients to set keepalive = 0, which means no keepalive # checks are made and the client will never be disconnected by the broker if no # messages are received. You should be very sure this is the behaviour that you # want. # # For MQTT v3.1.1 and v3.1 clients, there is no mechanism to tell the client # what keepalive value they should use. If an MQTT v3.1.1 or v3.1 client # specifies a keepalive time greater than max_keepalive they will be sent a # CONNACK message with the "identifier rejected" reason code, and disconnected. # #max_keepalive 65535 # For MQTT v5 clients, it is possible to have the server send a "maximum packet # size" value that will instruct the client it will not accept MQTT packets # with size greater than max_packet_size bytes. This applies to the full MQTT # packet, not just the payload. Setting this option to a positive value will # set the maximum packet size to that number of bytes. If a client sends a # packet which is larger than this value, it will be disconnected. This applies # to all clients regardless of the protocol version they are using, but v3.1.1 # and earlier clients will of course not have received the maximum packet size # information. Defaults to no limit. Setting below 20 bytes is forbidden # because it is likely to interfere with ordinary client operation, even with # very small payloads. #max_packet_size 0 # QoS 1 and 2 messages above those currently in-flight will be queued per # client until this limit is exceeded. Defaults to 0. (No maximum) # See also max_queued_messages. # If both max_queued_messages and max_queued_bytes are specified, packets will # be queued until the first limit is reached. #max_queued_bytes 0 # Set the maximum QoS supported. Clients publishing at a QoS higher than # specified here will be disconnected. #max_qos 2 # The maximum number of QoS 1 and 2 messages to hold in a queue per client # above those that are currently in-flight. Defaults to 1000. Set # to 0 for no maximum (not recommended). # See also queue_qos0_messages. # See also max_queued_bytes. #max_queued_messages 1000 # # This option sets the maximum number of heap memory bytes that the broker will # allocate, and hence sets a hard limit on memory use by the broker. Memory # requests that exceed this value will be denied. The effect will vary # depending on what has been denied. If an incoming message is being processed, # then the message will be dropped and the publishing client will be # disconnected. If an outgoing message is being sent, then the individual # message will be dropped and the receiving client will be disconnected. # Defaults to no limit. #memory_limit 0 # This option sets the maximum publish payload size that the broker will allow. # Received messages that exceed this size will not be accepted by the broker. # The default value is 0, which means that all valid MQTT messages are # accepted. MQTT imposes a maximum payload size of 268435455 bytes. #message_size_limit 0 # This option allows the session of persistent clients (those with clean # session set to false) that are not currently connected to be removed if they # do not reconnect within a certain time frame. This is a non-standard option # in MQTT v3.1. MQTT v3.1.1 and v5.0 allow brokers to remove client sessions. # # Badly designed clients may set clean session to false whilst using a randomly # generated client id. This leads to persistent clients that connect once and # never reconnect. This option allows these clients to be removed. This option # allows persistent clients (those with clean session set to false) to be # removed if they do not reconnect within a certain time frame. # # The expiration period should be an integer followed by one of h d w m y for # hour, day, week, month and year respectively. For example # # persistent_client_expiration 2m # persistent_client_expiration 14d # persistent_client_expiration 1y # # The default if not set is to never expire persistent clients. #persistent_client_expiration # Write process id to a file. Default is a blank string which means # a pid file shouldn't be written. # This should be set to /var/run/mosquitto/mosquitto.pid if mosquitto is # being run automatically on boot with an init script and # start-stop-daemon or similar. pid_file /var/packages/mosquitto/var/mosquitto.pid # Set to true to queue messages with QoS 0 when a persistent client is # disconnected. These messages are included in the limit imposed by # max_queued_messages and max_queued_bytes # Defaults to false. # This is a non-standard option for the MQTT v3.1 spec but is allowed in # v3.1.1. #queue_qos0_messages false # Set to false to disable retained message support. If a client publishes a # message with the retain bit set, it will be disconnected if this is set to # false. #retain_available true # Disable Nagle's algorithm on client sockets. This has the effect of reducing # latency of individual messages at the potential cost of increasing the number # of packets being sent. #set_tcp_nodelay false # Time in seconds between updates of the $SYS tree. # Set to 0 to disable the publishing of the $SYS tree. #sys_interval 10 # The MQTT specification requires that the QoS of a message delivered to a # subscriber is never upgraded to match the QoS of the subscription. Enabling # this option changes this behaviour. If upgrade_outgoing_qos is set true, # messages sent to a subscriber will always match the QoS of its subscription. # This is a non-standard option explicitly disallowed by the spec. #upgrade_outgoing_qos false # When run as root, drop privileges to this user and its primary # group. # Set to root to stay as root, but this is not recommended. # If set to "mosquitto", or left unset, and the "mosquitto" user does not exist # then it will drop privileges to the "nobody" user instead. # If run as a non-root user, this setting has no effect. # Note that on Windows this has no effect and so mosquitto should be started by # the user you wish it to run as. user sc-mosquitto # ================================================================= # Listeners # ================================================================= # Listen on a port/ip address combination. By using this variable # multiple times, mosquitto can listen on more than one port. If # this variable is used and neither bind_address nor port given, # then the default listener will not be started. # The port number to listen on must be given. Optionally, an ip # address or host name may be supplied as a second argument. In # this case, mosquitto will attempt to bind the listener to that # address and so restrict access to the associated network and # interface. By default, mosquitto will listen on all interfaces. # Note that for a websockets listener it is not possible to bind to a host # name. # # On systems that support Unix Domain Sockets, it is also possible # to create a # Unix socket rather than opening a TCP socket. In # this case, the port number should be set to 0 and a unix socket # path must be provided, e.g. # listener 0 /tmp/mosquitto.sock # # listener port-number [ip address/host name/unix socket path] listener 1883 127.0.0.1 # By default, a listener will attempt to listen on all supported IP protocol # versions. If you do not have an IPv4 or IPv6 interface you may wish to # disable support for either of those protocol versions. In particular, note # that due to the limitations of the websockets library, it will only ever # attempt to open IPv6 sockets if IPv6 support is compiled in, and so will fail # if IPv6 is not available. # # Set to `ipv4` to force the listener to only use IPv4, or set to `ipv6` to # force the listener to only use IPv6. If you want support for both IPv4 and # IPv6, then do not use the socket_domain option. # #socket_domain # Bind the listener to a specific interface. This is similar to # the [ip address/host name] part of the listener definition, but is useful # when an interface has multiple addresses or the address may change. If used # with the [ip address/host name] part of the listener definition, then the # bind_interface option will take priority. # Not available on Windows. # # Example: bind_interface eth0 #bind_interface # When a listener is using the websockets protocol, it is possible to serve # http data as well. Set http_dir to a directory which contains the files you # wish to serve. If this option is not specified, then no normal http # connections will be possible. #http_dir # The maximum number of client connections to allow. This is # a per listener setting. # Default is -1, which means unlimited connections. # Note that other process limits mean that unlimited connections # are not really possible. Typically the default maximum number of # connections possible is around 1024. #max_connections -1 # The listener can be restricted to operating within a topic hierarchy using # the mount_point option. This is achieved be prefixing the mount_point string # to all topics for any clients connected to this listener. This prefixing only # happens internally to the broker; the client will not see the prefix. #mount_point # Choose the protocol to use when listening. # This can be either mqtt or websockets. # Certificate based TLS may be used with websockets, except that only the # cafile, certfile, keyfile, ciphers, and ciphers_tls13 options are supported. #protocol mqtt # Set use_username_as_clientid to true to replace the clientid that a client # connected with with its username. This allows authentication to be tied to # the clientid, which means that it is possible to prevent one client # disconnecting another by using the same clientid. # If a client connects with no username it will be disconnected as not # authorised when this option is set to true. # Do not use in conjunction with clientid_prefixes. # See also use_identity_as_username. # This does not apply globally, but on a per-listener basis. #use_username_as_clientid # Change the websockets headers size. This is a global option, it is not # possible to set per listener. This option sets the size of the buffer used in # the libwebsockets library when reading HTTP headers. If you are passing large # header data such as cookies then you may need to increase this value. If left # unset, or set to 0, then the default of 1024 bytes will be used. #websockets_headers_size # ----------------------------------------------------------------- # Certificate based SSL/TLS support # ----------------------------------------------------------------- # The following options can be used to enable certificate based SSL/TLS support # for this listener. Note that the recommended port for MQTT over TLS is 8883, # but this must be set manually. # # See also the mosquitto-tls man page and the "Pre-shared-key based SSL/TLS # support" section. Only one of certificate or PSK encryption support can be # enabled for any listener. # Both of certfile and keyfile must be defined to enable certificate based # TLS encryption. # Path to the PEM encoded server certificate. #certfile # Path to the PEM encoded keyfile. #keyfile # If you wish to control which encryption ciphers are used, use the ciphers # option. The list of available ciphers can be optained using the "openssl # ciphers" command and should be provided in the same format as the output of # that command. This applies to TLS 1.2 and earlier versions only. Use # ciphers_tls1.3 for TLS v1.3. #ciphers # Choose which TLS v1.3 ciphersuites are used for this listener. # Defaults to "TLS_AES_256_GCM_SHA384:TLS_CHACHA20_POLY1305_SHA256:TLS_AES_128_GCM_SHA256" #ciphers_tls1.3 # If you have require_certificate set to true, you can create a certificate # revocation list file to revoke access to particular client certificates. If # you have done this, use crlfile to point to the PEM encoded revocation file. #crlfile # To allow the use of ephemeral DH key exchange, which provides forward # security, the listener must load DH parameters. This can be specified with # the dhparamfile option. The dhparamfile can be generated with the command # e.g. "openssl dhparam -out dhparam.pem 2048" #dhparamfile # By default an TLS enabled listener will operate in a similar fashion to a # https enabled web server, in that the server has a certificate signed by a CA # and the client will verify that it is a trusted certificate. The overall aim # is encryption of the network traffic. By setting require_certificate to true, # the client must provide a valid certificate in order for the network # connection to proceed. This allows access to the broker to be controlled # outside of the mechanisms provided by MQTT. #require_certificate false # cafile and capath define methods of accessing the PEM encoded # Certificate Authority certificates that will be considered trusted when # checking incoming client certificates. # cafile defines the path to a file containing the CA certificates. # capath defines a directory that will be searched for files # containing the CA certificates. For capath to work correctly, the # certificate files must have ".crt" as the file ending and you must run # "openssl rehash <path to capath>" each time you add/remove a certificate. #cafile #capath # If require_certificate is true, you may set use_identity_as_username to true # to use the CN value from the client certificate as a username. If this is # true, the password_file option will not be used for this listener. #use_identity_as_username false # ----------------------------------------------------------------- # Pre-shared-key based SSL/TLS support # ----------------------------------------------------------------- # The following options can be used to enable PSK based SSL/TLS support for # this listener. Note that the recommended port for MQTT over TLS is 8883, but # this must be set manually. # # See also the mosquitto-tls man page and the "Certificate based SSL/TLS # support" section. Only one of certificate or PSK encryption support can be # enabled for any listener. # The psk_hint option enables pre-shared-key support for this listener and also # acts as an identifier for this listener. The hint is sent to clients and may # be used locally to aid authentication. The hint is a free form string that # doesn't have much meaning in itself, so feel free to be creative. # If this option is provided, see psk_file to define the pre-shared keys to be # used or create a security plugin to handle them. #psk_hint # When using PSK, the encryption ciphers used will be chosen from the list of # available PSK ciphers. If you want to control which ciphers are available, # use the "ciphers" option. The list of available ciphers can be optained # using the "openssl ciphers" command and should be provided in the same format # as the output of that command. #ciphers # Set use_identity_as_username to have the psk identity sent by the client used # as its username. Authentication will be carried out using the PSK rather than # the MQTT username/password and so password_file will not be used for this # listener. #use_identity_as_username false # ================================================================= # Persistence # ================================================================= # If persistence is enabled, save the in-memory database to disk # every autosave_interval seconds. If set to 0, the persistence # database will only be written when mosquitto exits. See also # autosave_on_changes. # Note that writing of the persistence database can be forced by # sending mosquitto a SIGUSR1 signal. #autosave_interval 1800 # If true, mosquitto will count the number of subscription changes, retained # messages received and queued messages and if the total exceeds # autosave_interval then the in-memory database will be saved to disk. # If false, mosquitto will save the in-memory database to disk by treating # autosave_interval as a time in seconds. #autosave_on_changes false # Save persistent message data to disk (true/false). # This saves information about all messages, including # subscriptions, currently in-flight messages and retained # messages. # retained_persistence is a synonym for this option. #persistence false # The filename to use for the persistent database, not including # the path. #persistence_file mosquitto.db # Location for persistent database. # Default is an empty string (current directory). # Set to e.g. /var/lib/mosquitto if running as a proper service on Linux or # similar. #persistence_location # ================================================================= # Logging # ================================================================= # Places to log to. Use multiple log_dest lines for multiple # logging destinations. # Possible destinations are: stdout stderr syslog topic file dlt # # stdout and stderr log to the console on the named output. # # syslog uses the userspace syslog facility which usually ends up # in /var/log/messages or similar. # # topic logs to the broker topic '$SYS/broker/log/<severity>', # where severity is one of D, E, W, N, I, M which are debug, error, # warning, notice, information and message. Message type severity is used by # the subscribe/unsubscribe log_types and publishes log messages to # $SYS/broker/log/M/susbcribe or $SYS/broker/log/M/unsubscribe. # # The file destination requires an additional parameter which is the file to be # logged to, e.g. "log_dest file /var/log/mosquitto.log". The file will be # closed and reopened when the broker receives a HUP signal. Only a single file # destination may be configured. # # The dlt destination is for the automotive `Diagnostic Log and Trace` tool. # This requires that Mosquitto has been compiled with DLT support. # # Note that if the broker is running as a Windows service it will default to # "log_dest none" and neither stdout nor stderr logging is available. # Use "log_dest none" if you wish to disable logging. #log_dest stderr # Types of messages to log. Use multiple log_type lines for logging # multiple types of messages. # Possible types are: debug, error, warning, notice, information, # none, subscribe, unsubscribe, websockets, all. # Note that debug type messages are for decoding the incoming/outgoing # network packets. They are not logged in "topics". #log_type error #log_type warning #log_type notice #log_type information # If set to true, client connection and disconnection messages will be included # in the log. #connection_messages true # If using syslog logging (not on Windows), messages will be logged to the # "daemon" facility by default. Use the log_facility option to choose which of # local0 to local7 to log to instead. The option value should be an integer # value, e.g. "log_facility 5" to use local5. #log_facility # If set to true, add a timestamp value to each log message. #log_timestamp true # Set the format of the log timestamp. If left unset, this is the number of # seconds since the Unix epoch. # This is a free text string which will be passed to the strftime function. To # get an ISO 8601 datetime, for example: # log_timestamp_format %Y-%m-%dT%H:%M:%S #log_timestamp_format # Change the websockets logging level. This is a global option, it is not # possible to set per listener. This is an integer that is interpreted by # libwebsockets as a bit mask for its lws_log_levels enum. See the # libwebsockets documentation for more details. "log_type websockets" must also # be enabled. #websockets_log_level 0 # ================================================================= # Security # ================================================================= # If set, only clients that have a matching prefix on their # clientid will be allowed to connect to the broker. By default, # all clients may connect. # For example, setting "secure-" here would mean a client "secure- # client" could connect but another with clientid "mqtt" couldn't. #clientid_prefixes # Boolean value that determines whether clients that connect # without providing a username are allowed to connect. If set to # false then a password file should be created (see the # password_file option) to control authenticated client access. # # Defaults to false, unless there are no listeners defined in the configuration # file, in which case it is set to true, but connections are only allowed from # the local machine. allow_anonymous true # ----------------------------------------------------------------- # Default authentication and topic access control # ----------------------------------------------------------------- # Control access to the broker using a password file. This file can be # generated using the mosquitto_passwd utility. If TLS support is not compiled # into mosquitto (it is recommended that TLS support should be included) then # plain text passwords are used, in which case the file should be a text file # with lines in the format: # username:password # The password (and colon) may be omitted if desired, although this # offers very little in the way of security. # # See the TLS client require_certificate and use_identity_as_username options # for alternative authentication options. If a plugin is used as well as # password_file, the plugin check will be made first. # An empty password file is installed as /var/packages/mosquitto/var/passwd # You can activate it here and add users with # mosquitto_passwd -b /var/packages/mosquitto/var/passwd <username> <password> #password_file /var/packages/mosquitto/var/passwd # Access may also be controlled using a pre-shared-key file. This requires # TLS-PSK support and a listener configured to use it. The file should be text # lines in the format: # identity:key # The key should be in hexadecimal format without a leading "0x". # If an plugin is used as well, the plugin check will be made first. #psk_file # Control access to topics on the broker using an access control list # file. If this parameter is defined then only the topics listed will # have access. # If the first character of a line of the ACL file is a # it is treated as a # comment. # Topic access is added with lines of the format: # # topic [read|write|readwrite|deny] <topic> # # The access type is controlled using "read", "write", "readwrite" or "deny". # This parameter is optional (unless <topic> contains a space character) - if # not given then the access is read/write. <topic> can contain the + or # # wildcards as in subscriptions. # # The "deny" option can used to explicity deny access to a topic that would # otherwise be granted by a broader read/write/readwrite statement. Any "deny" # topics are handled before topics that grant read/write access. # # The first set of topics are applied to anonymous clients, assuming # allow_anonymous is true. User specific topic ACLs are added after a # user line as follows: # # user <username> # # The username referred to here is the same as in password_file. It is # not the clientid. # # # If is also possible to define ACLs based on pattern substitution within the # topic. The patterns available for substition are: # # %c to match the client id of the client # %u to match the username of the client # # The substitution pattern must be the only text for that level of hierarchy. # # The form is the same as for the topic keyword, but using pattern as the # keyword. # Pattern ACLs apply to all users even if the "user" keyword has previously # been given. # # If using bridges with usernames and ACLs, connection messages can be allowed # with the following pattern: # pattern write $SYS/broker/connection/%c/state # # pattern [read|write|readwrite] <topic> # # Example: # # pattern write sensor/%u/data # # If an plugin is used as well as acl_file, the plugin check will be # made first. #acl_file # ----------------------------------------------------------------- # External authentication and topic access plugin options # ----------------------------------------------------------------- # External authentication and access control can be supported with the # plugin option. This is a path to a loadable plugin. See also the # plugin_opt_* options described below. # # The plugin option can be specified multiple times to load multiple # plugins. The plugins will be processed in the order that they are specified # here. If the plugin option is specified alongside either of # password_file or acl_file then the plugin checks will be made first. # # If the per_listener_settings option is false, the plugin will be apply to all # listeners. If per_listener_settings is true, then the plugin will apply to # the current listener being defined only. # # This option is also available as `auth_plugin`, but this use is deprecated # and will be removed in the future. # #plugin # If the plugin option above is used, define options to pass to the # plugin here as described by the plugin instructions. All options named # using the format plugin_opt_* will be passed to the plugin, for example: # # This option is also available as `auth_opt_*`, but this use is deprecated # and will be removed in the future. # # plugin_opt_db_host # plugin_opt_db_port # plugin_opt_db_username # plugin_opt_db_password # ================================================================= # Bridges # ================================================================= # A bridge is a way of connecting multiple MQTT brokers together. # Create a new bridge using the "connection" option as described below. Set # options for the bridges using the remaining parameters. You must specify the # address and at least one topic to subscribe to. # # Each connection must have a unique name. # # The address line may have multiple host address and ports specified. See # below in the round_robin description for more details on bridge behaviour if # multiple addresses are used. Note that if you use an IPv6 address, then you # are required to specify a port. # # The direction that the topic will be shared can be chosen by # specifying out, in or both, where the default value is out. # The QoS level of the bridged communication can be specified with the next # topic option. The default QoS level is 0, to change the QoS the topic # direction must also be given. # # The local and remote prefix options allow a topic to be remapped when it is # bridged to/from the remote broker. This provides the ability to place a topic # tree in an appropriate location. # # For more details see the mosquitto.conf man page. # # Multiple topics can be specified per connection, but be careful # not to create any loops. # # If you are using bridges with cleansession set to false (the default), then # you may get unexpected behaviour from incoming topics if you change what # topics you are subscribing to. This is because the remote broker keeps the # subscription for the old topic. If you have this problem, connect your bridge # with cleansession set to true, then reconnect with cleansession set to false # as normal. #connection <name> #address <host>[:<port>] [<host>[:<port>]] #topic <topic> [[[out | in | both] qos-level] local-prefix remote-prefix] # If you need to have the bridge connect over a particular network interface, # use bridge_bind_address to tell the bridge which local IP address the socket # should bind to, e.g. `bridge_bind_address 192.168.1.10` #bridge_bind_address # If a bridge has topics that have "out" direction, the default behaviour is to # send an unsubscribe request to the remote broker on that topic. This means # that changing a topic direction from "in" to "out" will not keep receiving # incoming messages. Sending these unsubscribe requests is not always # desirable, setting bridge_attempt_unsubscribe to false will disable sending # the unsubscribe request. #bridge_attempt_unsubscribe true # Set the version of the MQTT protocol to use with for this bridge. Can be one # of mqttv50, mqttv311 or mqttv31. Defaults to mqttv311. #bridge_protocol_version mqttv311 # Set the clean session variable for this bridge. # When set to true, when the bridge disconnects for any reason, all # messages and subscriptions will be cleaned up on the remote # broker. Note that with cleansession set to true, there may be a # significant amount of retained messages sent when the bridge # reconnects after losing its connection. # When set to false, the subscriptions and messages are kept on the # remote broker, and delivered when the bridge reconnects. #cleansession false # Set the amount of time a bridge using the lazy start type must be idle before # it will be stopped. Defaults to 60 seconds. #idle_timeout 60 # Set the keepalive interval for this bridge connection, in # seconds. #keepalive_interval 60 # Set the clientid to use on the local broker. If not defined, this defaults to # 'local.<clientid>'. If you are bridging a broker to itself, it is important # that local_clientid and clientid do not match. #local_clientid # If set to true, publish notification messages to the local and remote brokers # giving information about the state of the bridge connection. Retained # messages are published to the topic $SYS/broker/connection/<clientid>/state # unless the notification_topic option is used. # If the message is 1 then the connection is active, or 0 if the connection has # failed. # This uses the last will and testament feature. #notifications true # Choose the topic on which notification messages for this bridge are # published. If not set, messages are published on the topic # $SYS/broker/connection/<clientid>/state #notification_topic # Set the client id to use on the remote end of this bridge connection. If not # defined, this defaults to 'name.hostname' where name is the connection name # and hostname is the hostname of this computer. # This replaces the old "clientid" option to avoid confusion. "clientid" # remains valid for the time being. #remote_clientid # Set the password to use when connecting to a broker that requires # authentication. This option is only used if remote_username is also set. # This replaces the old "password" option to avoid confusion. "password" # remains valid for the time being. #remote_password # Set the username to use when connecting to a broker that requires # authentication. # This replaces the old "username" option to avoid confusion. "username" # remains valid for the time being. #remote_username # Set the amount of time a bridge using the automatic start type will wait # until attempting to reconnect. # This option can be configured to use a constant delay time in seconds, or to # use a backoff mechanism based on "Decorrelated Jitter", which adds a degree # of randomness to when the restart occurs. # # Set a constant timeout of 20 seconds: # restart_timeout 20 # # Set backoff with a base (start value) of 10 seconds and a cap (upper limit) of # 60 seconds: # restart_timeout 10 30 # # Defaults to jitter with a base of 5 and cap of 30 #restart_timeout 5 30 # If the bridge has more than one address given in the address/addresses # configuration, the round_robin option defines the behaviour of the bridge on # a failure of the bridge connection. If round_robin is false, the default # value, then the first address is treated as the main bridge connection. If # the connection fails, the other secondary addresses will be attempted in # turn. Whilst connected to a secondary bridge, the bridge will periodically # attempt to reconnect to the main bridge until successful. # If round_robin is true, then all addresses are treated as equals. If a # connection fails, the next address will be tried and if successful will # remain connected until it fails #round_robin false # Set the start type of the bridge. This controls how the bridge starts and # can be one of three types: automatic, lazy and once. Note that RSMB provides # a fourth start type "manual" which isn't currently supported by mosquitto. # # "automatic" is the default start type and means that the bridge connection # will be started automatically when the broker starts and also restarted # after a short delay (30 seconds) if the connection fails. # # Bridges using the "lazy" start type will be started automatically when the # number of queued messages exceeds the number set with the "threshold" # parameter. It will be stopped automatically after the time set by the # "idle_timeout" parameter. Use this start type if you wish the connection to # only be active when it is needed. # # A bridge using the "once" start type will be started automatically when the # broker starts but will not be restarted if the connection fails. #start_type automatic # Set the number of messages that need to be queued for a bridge with lazy # start type to be restarted. Defaults to 10 messages. # Must be less than max_queued_messages. #threshold 10 # If try_private is set to true, the bridge will attempt to indicate to the # remote broker that it is a bridge not an ordinary client. If successful, this # means that loop detection will be more effective and that retained messages # will be propagated correctly. Not all brokers support this feature so it may # be necessary to set try_private to false if your bridge does not connect # properly. #try_private true # Some MQTT brokers do not allow retained messages. MQTT v5 gives a mechanism # for brokers to tell clients that they do not support retained messages, but # this is not possible for MQTT v3.1.1 or v3.1. If you need to bridge to a # v3.1.1 or v3.1 broker that does not support retained messages, set the # bridge_outgoing_retain option to false. This will remove the retain bit on # all outgoing messages to that bridge, regardless of any other setting. #bridge_outgoing_retain true # If you wish to restrict the size of messages sent to a remote bridge, use the # bridge_max_packet_size option. This sets the maximum number of bytes for # the total message, including headers and payload. # Note that MQTT v5 brokers may provide their own maximum-packet-size property. # In this case, the smaller of the two limits will be used. # Set to 0 for "unlimited". #bridge_max_packet_size 0 # ----------------------------------------------------------------- # Certificate based SSL/TLS support # ----------------------------------------------------------------- # Either bridge_cafile or bridge_capath must be defined to enable TLS support # for this bridge. # bridge_cafile defines the path to a file containing the # Certificate Authority certificates that have signed the remote broker # certificate. # bridge_capath defines a directory that will be searched for files containing # the CA certificates. For bridge_capath to work correctly, the certificate # files must have ".crt" as the file ending and you must run "openssl rehash # <path to capath>" each time you add/remove a certificate. #bridge_cafile #bridge_capath # If the remote broker has more than one protocol available on its port, e.g. # MQTT and WebSockets, then use bridge_alpn to configure which protocol is # requested. Note that WebSockets support for bridges is not yet available. #bridge_alpn # When using certificate based encryption, bridge_insecure disables # verification of the server hostname in the server certificate. This can be # useful when testing initial server configurations, but makes it possible for # a malicious third party to impersonate your server through DNS spoofing, for # example. Use this option in testing only. If you need to resort to using this # option in a production environment, your setup is at fault and there is no # point using encryption. #bridge_insecure false # Path to the PEM encoded client certificate, if required by the remote broker. #bridge_certfile # Path to the PEM encoded client private key, if required by the remote broker. #bridge_keyfile # ----------------------------------------------------------------- # PSK based SSL/TLS support # ----------------------------------------------------------------- # Pre-shared-key encryption provides an alternative to certificate based # encryption. A bridge can be configured to use PSK with the bridge_identity # and bridge_psk options. These are the client PSK identity, and pre-shared-key # in hexadecimal format with no "0x". Only one of certificate and PSK based # encryption can be used on one # bridge at once. #bridge_identity #bridge_psk # ================================================================= # External config files # ================================================================= # External configuration files may be included by using the # include_dir option. This defines a directory that will be searched # for config files. All files that end in '.conf' will be loaded as # a configuration file. It is best to have this as the last option # in the main file. This option will only be processed from the main # configuration file. The directory specified must not contain the # main configuration file. # Files within include_dir will be loaded sorted in case-sensitive # alphabetical order, with capital letters ordered first. If this option is # given multiple times, all of the files from the first instance will be # processed before the next instance. See the man page for examples. #include_dir
  11. Bonjour, Je n'ai vu aucun bouton paramétrage pour mosquito, sinon ou le trouver ? MQTT explorer affiche disconnected from serveur
  12. Bonsoir J'ai un certain nombre d'éléments domotiques dans ma maison et pour le moment j'ai un broker mosquito qui tourne sur un raspberry PI. J'aimerais bien pouvoir avoir un broker mosquito qui tourne sur mon NAS. DSM 7.2.1 j'ai installé et lancé depuis le centre de paquets : Eclipse Mosquitto version 2.0.18-15 Dans le pare-feu, j'ai ouvert les ports pour mosquito. Sur mon PC avec MQTTX, mqtt:// 192.168.0.2 port 1883, j'ai Error: connect ECONNREFUSED 192.168.0.2:1883 J'ai essayé pas mal de chose, je n'arrive pas à comprendre pourquoi j'ai pas accès à mosquito qui tourne sur mon NAS. Merci de l'aide que vous pourrez m'apporter 🙂
  13. Bonjour J'aimerais savoir si on peut réaliser 2 zones de détection ? je prends en vidéo l'entrée de ma maison et on voit également une petite route derrière mon portail. J'aimerais que chaque fois qu'il y a un mouvement ça enregistre. Par contre, j'aimerais bien lorsqu'une personne rentre dans ma cour que ça enregistre et que ça m'envoie une notification. Est-ce que c'est possible ? Pour la petite histoire la première nuit où j'ai installé ma caméra et le système de surveillance, j'ai repéré un gars qui faisait du repérage sur les différentes entrées des voisins avec une cagoule genre GIGN… merci
×
×
  • Créer...

Information importante

Nous avons placé des cookies sur votre appareil pour aider à améliorer ce site. Vous pouvez choisir d’ajuster vos paramètres de cookie, sinon nous supposerons que vous êtes d’accord pour continuer.